@alopanio:

alopanio
alopanio
Open In TikTok:
Region: ID
Saturday 11 October 2025 17:24:52 GMT
20972
790
6
54

Music

Download

Comments

rowrr264
Nana aja :
pertama
2025-10-11 17:29:18
0
rarahan7
rarahan7 :
😂
2025-10-28 15:24:16
0
acill.n.0623
acilibnu527 :
😁
2025-10-20 12:25:18
0
rianabdulmuti
rian a.m :
😂
2025-10-17 15:55:49
0
oodromansya
Ood Romansya :
🤤🤤🤤🤤🤤🤤🤤🤤🤤🤤
2025-10-15 23:01:03
0
lazy.sixces
murid senyap :
gempa gempa woy
2025-10-12 04:18:17
0
To see more videos from user @alopanio, please go to the Tikwm homepage.

Other Videos

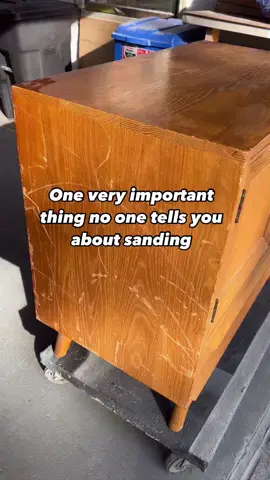
🎨✨ First Things First:  When going to bare wood , I always start with stripper to remove most of the old finish. This protects the wood and saves time, and prevents damage—especially on delicate veneers! 🛡️ ✨Then apply THE GOLDEN RULE OF SANDING: Don’t Skip More Than One Grit or you’ll end up with scratches that won’t sand out! 🪵 Skipping grits when sanding can lead to uneven surfaces because each grit refines the wood gradually. Here’s why it matters: 	* Each grit removes scratches from the previous one, preventing visible imperfections. 	*Using consecutive grits reduces effort and prevents excessive wear on finer grits. 	*Skipping grits can leave micro-scratches that show after staining or finishing. 	* You want Surface Uniformity: Consistent sanding ensures even finishes. Skipping from 80 to 220-grit may leave scratches that the finer grit can’t remove.  If you ou start with 80 grit, your next step should be 100 or 120—not 150 or 180. • Solid wood? Start with 80 or 100 grit to remove imperfections. • Wood veneer? Start higher, around 150 grit, to avoid sanding through the thin layer.  Each step smooths your surface and preps it for a flawless finish. Skipping grits? That’s how swirl marks and uneven finishes sneak in! 🚫 Bonus Tip: The Pencil Trick 🖊️ Scribble pencil marks on the surface before sanding. As you sand, the marks disappear, showing exactly where you’ve sanded and what’s left. No guesswork, no missed spots. #sanding #woodworkingtips #furniturefinishing
🎨✨ First Things First: When going to bare wood , I always start with stripper to remove most of the old finish. This protects the wood and saves time, and prevents damage—especially on delicate veneers! 🛡️ ✨Then apply THE GOLDEN RULE OF SANDING: Don’t Skip More Than One Grit or you’ll end up with scratches that won’t sand out! 🪵 Skipping grits when sanding can lead to uneven surfaces because each grit refines the wood gradually. Here’s why it matters: * Each grit removes scratches from the previous one, preventing visible imperfections. *Using consecutive grits reduces effort and prevents excessive wear on finer grits. *Skipping grits can leave micro-scratches that show after staining or finishing. * You want Surface Uniformity: Consistent sanding ensures even finishes. Skipping from 80 to 220-grit may leave scratches that the finer grit can’t remove. If you ou start with 80 grit, your next step should be 100 or 120—not 150 or 180. • Solid wood? Start with 80 or 100 grit to remove imperfections. • Wood veneer? Start higher, around 150 grit, to avoid sanding through the thin layer. Each step smooths your surface and preps it for a flawless finish. Skipping grits? That’s how swirl marks and uneven finishes sneak in! 🚫 Bonus Tip: The Pencil Trick 🖊️ Scribble pencil marks on the surface before sanding. As you sand, the marks disappear, showing exactly where you’ve sanded and what’s left. No guesswork, no missed spots. #sanding #woodworkingtips #furniturefinishing

About